Creating a gallery wall is a fun way to personalize your space and showcase your favorite artwork, photos, or other visual elements. Here’s a step-by-step guide to help you create a stunning gallery wall:
1. Choose the Right Location
- Pick a wall that has enough space to display multiple pieces, such as a living room, hallway, or even a bedroom.
- Make sure the wall isn’t too crowded with furniture or other items. It should be the focal point of the room.
2. Select Your Artwork
- Theme: Decide on a theme for your gallery wall. It could be a color scheme, a specific type of artwork (e.g., photography, abstract art, vintage posters), or a mix of personal items like travel photos or framed quotes.
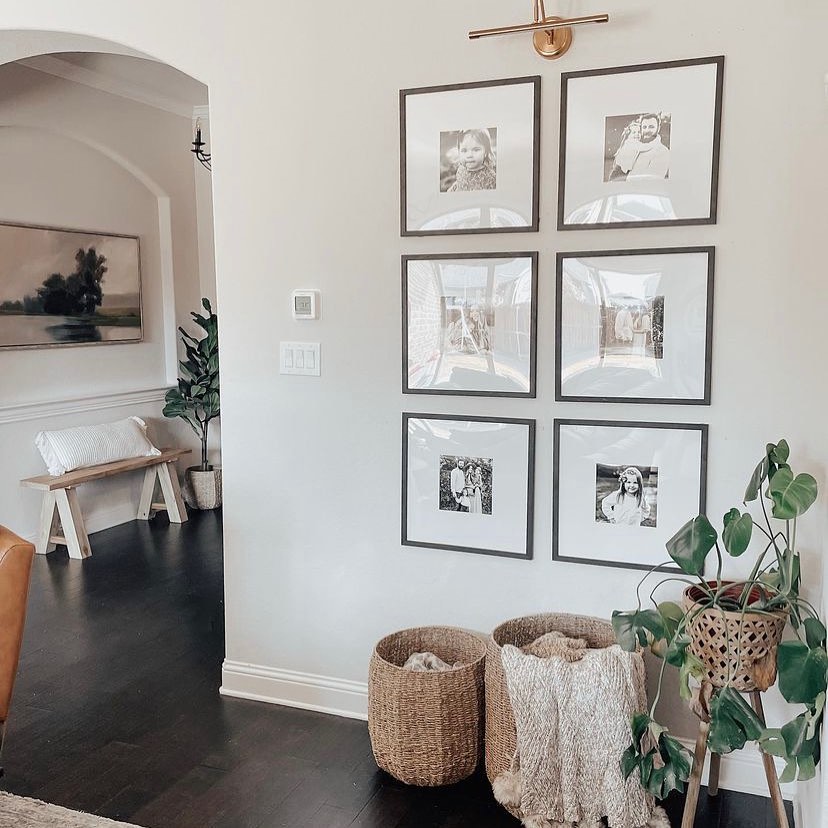
- Sizes and Shapes: Choose a variety of frame sizes (and frame types, like modern vs. vintage) to create visual interest. You can mix large and small frames or go with uniform frames for a more cohesive look.
- Personal Touch: Add personal items like family photos, old postcards, or prints from your favorite artists. These make the gallery wall uniquely yours.
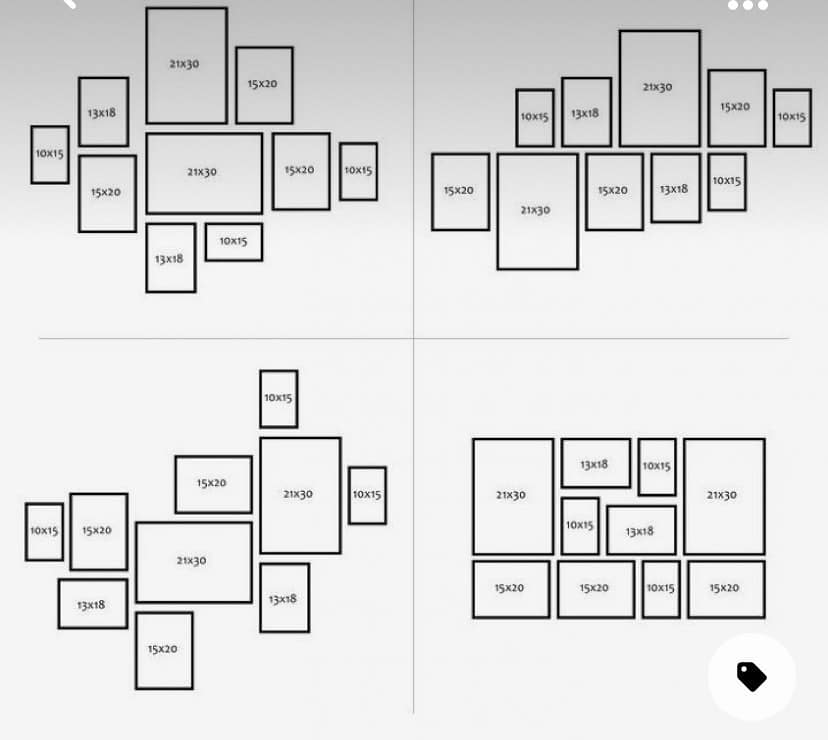
3. Lay It Out
- Before Hanging: Arrange the pieces on the floor first to figure out the best layout. You can create a grid pattern, an organic flow, or even a salon-style arrangement (where the pieces are arranged close together in a somewhat random manner).
- Spacing: Maintain consistent spacing between the frames, usually around 2–4 inches. You can vary the spacing if you prefer a more dynamic look.
- Leveling: Make sure everything is level. Use a tape measure to help with the spacing and placement.
4. Prepare the Frames
- If the frames don’t have hanging hardware, you may need to add D-rings or picture hanging wire.
- Consider using frames with matting for a more polished look, or go frameless for a minimal aesthetic.
5. Hanging the Artwork
- Use Picture Hanging Tools: For a neat and secure display, consider using picture hooks or adhesive strips (if you’re renting and don’t want to put holes in the wall).
- Start at the Center: If you’re doing a larger arrangement, begin with the center piece and work outward. This keeps the spacing consistent and helps you stay balanced.
- Use a Level: As you hang each piece, check it with a level to ensure it’s straight.
6. Final Touches
- Once everything is hung, step back and evaluate. Sometimes it’s necessary to adjust a piece or add one more to complete the look.
- You can also add other small elements like decorative shelves or plants to enhance the visual appeal of your gallery wall.
7. Enjoy Your Gallery Wall!
- Take a moment to admire the finished wall! It should reflect your personality and bring the room together in a stylish way.
Would you like any tips on selecting frames or suggestions for types of artwork to include? Contact us today!